Trick or Treat Card

trick-or-treat-card

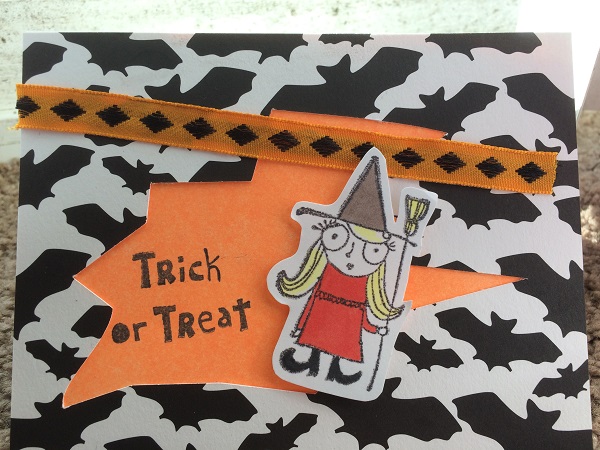
For my second card with my new My Mind’s Eye stamp set, I used the witch stamp as the main image.  First, I stamped the witch in black ink, then colored it in with Spectrum Noir markers and cut it out. I colored a piece of white cardstock with orange ink for the background.  I thought a jagged-edged die cut would give a nice Halloween-y feel, so I created a random shape with my Silhouette machine and cut it out of patterned paper.

I adhered the patterned paper onto the orange-inked piece of cardstock, then stamped the sentiment in black ink.  I glued a piece of ribbon, then adhered the witch with dimensional adhesive.

Supplies used:

  • Stamps: My Mind’s Eye
  • Markers: Spectrum Noir
  • Die cut: Silhouette

Save

Save

Spooky Monsters Card

frankenstein-card

There are so many great Halloween stamp sets!  Even though I have several, I picked up a new set recently from My Mind’s Eye.

I decided to use the cute Frankenstein monster stamp as a pattern for a card.  First, I cut a piece of white cardstock with zigzag scissors.  Amazingly, I managed to stamp the 6 monsters perfectly (more or less) on the first try, using black ink.  I colored them in with Spectrum Noir markers.  Then I stamped “spooky night” using Distress Ink three times from the same set and cut them out (just the “spooky” part) with zigzag scissors.  I adhered the sentiments to the card with dimensional adhesive.

I applied washi tape to a card form to create the green background, then I adhered the stamped piece to it.  That was it!

Supplies used:

  • Ink: Distress Ink, miscellaneous
  • Stamps: My Mind’s Eye
  • Markers: Spectrum Noir
  • washi tape: Scotch

Doggie Thank You

Dog thank you card

I owed a thank you card to my best friend, who read about 100 cover letters when I was out of work.  Since he loves dogs, I wanted to use this adorable dog from Paper Smooches.

I stamped the dog and bones in brown ink, cut them out, then colored them in with markers.  I stamped the sentiment on a square of white cardstock in brown ink, then adhered it on patterned “paw” paper for the background.  I adhered the dog with dimensional adhesive to the center of the square, and glued the bones around the square.

Thanks for looking!

Supplies:

  • Markers: Spectrum Noir
  • Stamps: Paper Smooches, Penny Black

“You Rock” Cassette Tape Card

You rock cardRemember cassettes?  You might, if you’re as old as I am.  When I played around with a texture medium I had lying around, I found I could make strips that look like the tape inside a cassette.  I found the perfect stencil to make the card I wanted and got to work.

First, I stenciled the cassette on white cardstock with neon inks, then cut it out.

For the layering pieces, I cut a rectangle from blue cardstock, then sprayed it with some sparkly colored sprays.  For the second layering piece, I cut a piece of patterned paper.

For the background piece, I cut “You rock!” from teal cardstock using a Silhouette machine, then I cut the cardstock to the size of my card base (A4).  I coated a piece of white cardstock with purple texture spray, let it dry, then adhered it to the underside of the teal stock.   Then I flicked more purple texture spray onto the piece.  I also cut the music notes with a Silhouette from black cardstock, then covered it with purple iridescent texture paste.

For the “tape,” I applied some texture medium to a craft mat in the width and length I wanted the piece to be, then let it dry.  Once dry, I could mold the tape to make waves, like real tape does if you pull it out of a cassette.  If you’re too young to remember, you’ll just have to trust me.

Finally, I adhered all the pieces together.

Thanks for looking!

Supplies

  • Stencil: The Crafter’s Workshop
  • Die cuts: Silhouette

Teal Butterfly Card

Teal Butterfly Card
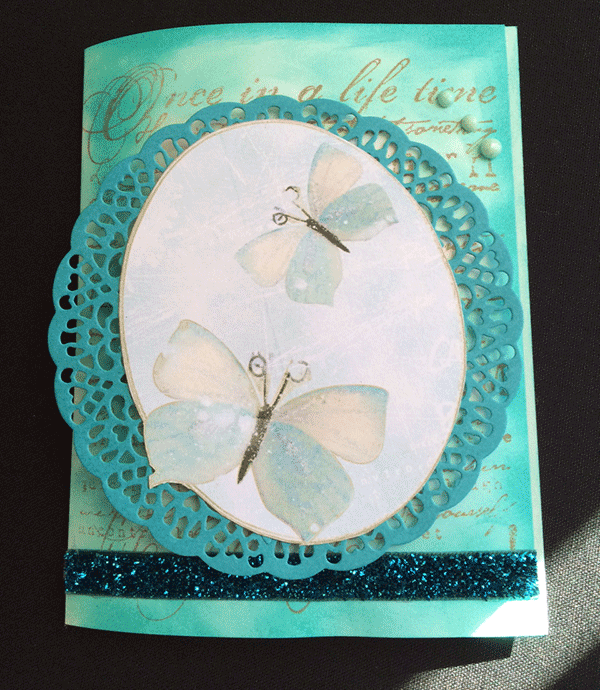
For this easy card, I let patterned paper do much of the work.

First, I die cut the intricate border shape out of teal paper.  Then, I cut an oval from the patterned paper to fit within the border shape.  I covered a manilla card with teal ink, then stamped the background image in brown ink, to pick up the brown tones in the patterned paper.  I adhered the layering pieces and added a piece of glittery ribbon.  Finally, I finished the card off with three jewels.

Thanks for looking!

Supplies:

  • Stamp: Crafter’s Companion
  • Ribbon: May Arts

Fishbowl “I Miss You” Card

"I miss you" fish card

I love my Silhouette. With the 1000s of designs available, it’s great when you have a very specific idea for a shape, as I did in this case: a fishbowl with a fish.

I used the Silhouette to cut out the fishbowl and fish from white cardstock. I cut a second “water” piece out of a plastic-y material. I decided to use a single fish inside the bowl so it would fit an “I miss you” theme. I colored the water with blue ink and the fish in yellow and orange; I used a blue marker for the bubbles.

I colored a strip of white cardstock with a dark teal colored texture spray, then cut a fishtail in the end. I stamped the sentiment in teal on white cardstock. For the little decorative piece of paper, I die cut a small piece of white cardstock, then inked it with light blue-green ink. I adhered all the elements, adding a strip of blue ribbon.

Thanks for looking!

Supplies:

  • Die cuts: Silhouette, Spellbinders
  • Stamp: Paper Smooches
  • Ribbon: American Crafts

Happy Wishes from the Emerald City

Seattle cardI love stamps related to places, and being a Pacific Northwesterner, I particularly love Seattle stamps. You might have heard it rains here sometimes (ha ha), so a gray, rainy theme seemed appropriate.

I inked a piece of white cardstock with blue ink, then stamped the Seattle stamp in gray ink.

Seattle card - rain close up
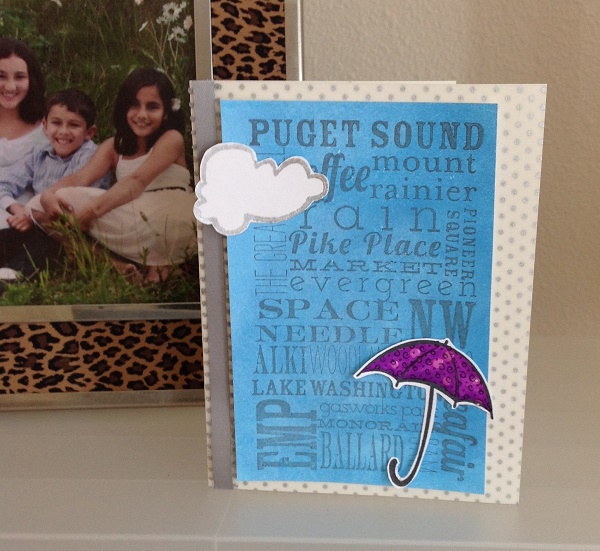
I added clear texture spray for “rain.”

I stamped the cloud in silver ink. I stamped the umbrella in black ink and colored it with markers. I used silver polka dot paper for the background, then adhered the blue layering piece, cloud, and umbrella. I finished with a piece of gray ribbon.

Those are my darling nieces and nephew in the background, by the way.

Thanks for looking!

Supplies:

  • Stamps: Impress, Penny Black, The Rubber Cafe
  • Ribbon: American Crafts
  • Markers: Spectrum Noir

You’re my cup of coffee

You're my cup of coffee cardI’m kind of a freak about crafts featuring coffee and coffee cups, maybe because I’m totally a freak about coffee.  So I had to buy this Hero Arts coffee cup stamp when I saw it.

To create the card, I stamped the coffee cup in dark red ink, then cut it out.  My X-acto knife skills need some work, but the inside of the cup was uncomplicated enough that my cut looks smooth (mostly).  I cut patterned paper the size of the card, then cut a smaller rectangle of a different pattern for a layering piece.  I used brown texture spray to get the look of a coffee stain on the layering piece, then rounded the corners and punched out two hearts.  For the smaller white hearts, I stamped on white cardstock in brown ink and cut them out.

To assemble, I adhered the background piece to the card, then the strip of ribbon, placing it where it would show through the punched hearts.  Then I adhered the layering piece, the coffee cup and white hearts.  To create “steam,” I took a couple of paper shavings from cutting the patterned paper and adhered them to the layering piece.

Thanks for looking!

Supplies used:

  • Stamps: Hero Arts, Avery Elle
  • Patterned paper: Lawn Fawn
  • Ribbon: May Arts
  • Punch, corner rounder: Martha Stewart Crafts

Cupcake Birthday

Birthday card with cupcakes

My sweet niece, Sona, just turned 17 (!).  Since she has a sweet tooth, like me, I decided to make her a cupcake card.

I stamped the cupcakes (Unity) in black ink, cut them out, then colored them with Spectrum Noir markers — a technique I am still trying to master, as you can see.  To assemble the card, I placed each cupcake on a circle of pink tissue paper from my Messy Box subscription.  I stamped the sentiment (Paper Smooches) in pink ink.  Finally, I sprayed a piece of cardstock with pink texture spray, then cut a strip and attached it to the bottom of the card.

Thanks for looking!